
Daikin mini split systems offer efficient heating and cooling solutions. Proper installation ensures safety‚ efficiency‚ and performance. Follow the manual to avoid issues like water leakage or electrical hazards.
Overview of Daikin Mini Split Systems
Daikin mini split systems are highly efficient heating and cooling solutions designed for flexibility and energy savings. These systems consist of an outdoor compressor unit and one or more indoor units‚ offering precise temperature control. They are ideal for spaces where traditional ductwork is not feasible. Daikin systems are known for their advanced inverter technology‚ which reduces energy consumption and operational noise. Available in various models‚ including wall-mounted‚ ceiling-recessed‚ and concealed duct units‚ they cater to diverse installation needs. These systems are also environmentally friendly‚ using R-32 refrigerant‚ which has a lower environmental impact compared to older refrigerants. Their compact design and versatility make them a popular choice for both residential and light commercial applications.
Importance of Proper Installation
Proper installation of Daikin mini split systems is crucial for ensuring optimal performance‚ safety‚ and longevity. Incorrect installation can lead to issues such as water leakage‚ electrical hazards‚ and reduced efficiency. It can also void the warranty and potentially cause fire risks if safety guidelines are not followed. A well-executed installation ensures that the system operates efficiently‚ saving energy and reducing utility bills. Additionally‚ proper installation minimizes the risk of system breakdowns and extends the lifespan of the unit. Adhering to the manufacturer’s instructions and safety precautions is essential to guarantee reliable operation and maintain a safe indoor environment. Proper installation also ensures compliance with local building codes and regulations.

Pre-Installation Requirements
Ensure a strong foundation for outdoor units and proper site preparation. Verify compatibility of tools and materials with Daikin specifications to meet safety and efficiency standards.
Safety Precautions
Always follow the installation manual to ensure safety. Use genuine Daikin parts to avoid fire or explosion risks. Properly ground the system to prevent electrical shock. Avoid installing near flammable materials or in areas prone to water exposure. Ensure the site is clear of obstacles and tripping hazards. Wear protective gear‚ including gloves and safety glasses‚ during installation. Never attempt to modify the unit or bypass safety features. If unsure‚ consult a certified professional. Properly handle refrigerants and electrical components to prevent accidents. Adhere to all local safety regulations and Daikin’s guidelines for a secure installation process.
Tools and Materials Needed
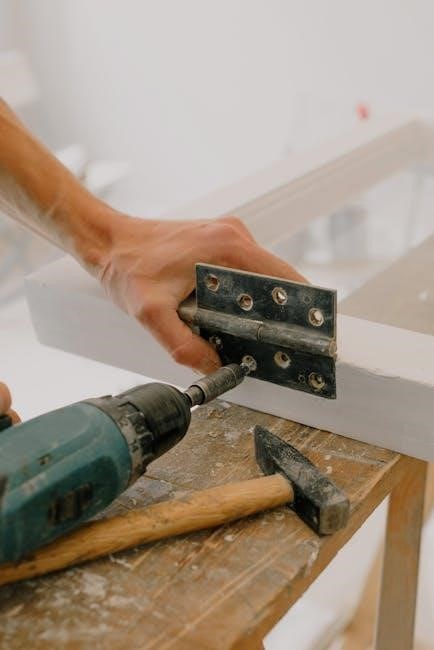
To install a Daikin mini split‚ gather essential tools and materials. These include a drill‚ screwdrivers‚ pliers‚ and wrenches. Ensure you have a vacuum pump for refrigerant charging and a manifold gauge set for pressure checks. Use a level to ensure proper mounting. Materials like copper tubing‚ insulation‚ and drainage kits are required. Refer to the installation manual for specific components. Always use Daikin-approved parts to maintain warranty and performance. Safety gear‚ such as gloves and safety glasses‚ is crucial. Organize all tools and materials beforehand to streamline the process and avoid delays during installation.
Site Preparation
Proper site preparation is crucial for a successful Daikin mini split installation. Ensure the area is clear of debris and obstacles. Verify that the site meets the manual’s requirements for drainage and electrical connections. For the outdoor unit‚ choose a location with adequate ventilation and avoid direct sunlight. Ensure the ground is level and stable to support the unit’s weight. Check for any nearby water sources to prevent moisture issues. Inspect the area for potential obstructions‚ such as trees or buildings‚ that could affect airflow. Proper site preparation ensures safe and efficient operation of the system. Always follow the manual’s guidelines for optimal results.
Understanding the Installation Manual
The Daikin mini split installation manual provides detailed instructions for safe and correct setup. It covers technical specifications‚ safety precautions‚ and proper installation procedures to ensure efficiency and reliability.
Reading the Manual
Reading the Daikin mini split installation manual is crucial for a successful setup. It outlines safety precautions‚ technical specifications‚ and step-by-step instructions. Ensure all warnings and guidelines are followed to prevent risks like electrical shocks or water leakage. The manual also includes wiring diagrams and installation checklists. Pay attention to specific instructions for charging refrigerants and connecting electrical components. Proper adherence ensures optimal performance and longevity of the system. Always refer to the manual before starting any installation task to avoid common mistakes and ensure compliance with Daikin’s recommendations.
Key Symbols and Warnings
The Daikin mini split installation manual includes essential symbols and warnings to ensure safety and proper installation. These symbols highlight potential hazards‚ such as electrical risks or gas leaks. Pay close attention to warnings about using unauthorized parts‚ as they may lead to fire or explosion. Specific symbols indicate steps like grounding the unit or checking refrigerant levels. The manual also emphasizes compliance with local regulations and safety standards. Ignoring these warnings can result in system malfunction or safety breaches. Always refer to the symbol key provided in the manual‚ especially on pages like Page 3‚ for clear guidance. Adherence ensures a secure and efficient installation process.
Technical Specifications
The Daikin mini split installation manual provides detailed technical specs for each model‚ such as the R32 Split Series. These specs include operating voltage‚ refrigerant type‚ and system capacity. Units like the FTXJ20MV1BW and FTXJ25MV1BW have specific power requirements and installation guidelines. The manual outlines maximum and minimum operating temperatures and recommended piping lengths. It also specifies compatible accessories and required tools. Proper understanding of these specs ensures compatibility and optimal performance. Always verify model-specific details before starting the installation to meet safety and efficiency standards. This information is crucial for a successful and compliant setup‚ as highlighted in the manual’s technical sections.

Indoor Unit Installation
Install the indoor unit in a suitable location‚ ensuring proper drainage and electrical connections. Follow the manual’s guidelines for mounting and connecting the unit safely and efficiently.
Choosing the Indoor Unit Location
When selecting a location for the indoor unit‚ ensure optimal airflow and accessibility. Avoid obstructions like furniture or curtains that could block air circulation. The unit should be installed in a central area of the room for even temperature distribution. It should also be positioned away from direct sunlight‚ heat sources‚ and moisture-prone areas to maintain accurate temperature sensing. Ensure the unit is at least 3 inches away from any walls or obstacles for proper air intake and discharge. Additionally‚ avoid installing the unit near water sources or in humid environments to prevent damage. Finally‚ ensure the unit is level and securely mounted to avoid vibration and noise.
Mounting the Indoor Unit
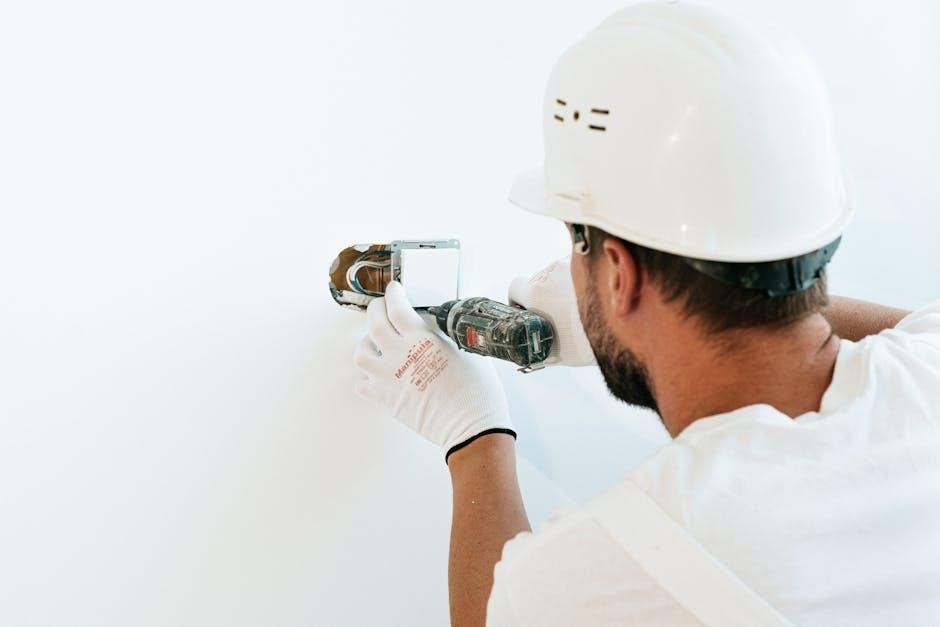
Mounting the indoor unit requires careful planning and precision. Use the wall mount provided in the kit to ensure stability. Mark the wall accurately based on the manual’s dimensions and drill pilot holes for the screws. Ensure the unit is level before securing it to avoid vibration and noise. Use appropriate screws and anchors suited for your wall type. Tighten all bolts firmly but avoid over-tightening‚ which could damage the unit. The indoor unit should be positioned at least 3 inches away from any walls or obstacles for proper airflow. Ensure the unit is high enough to avoid furniture interference but low enough for easy maintenance access. Always follow the manufacturer’s guidelines for secure and proper installation.
Connecting the Indoor Unit
Connect the indoor unit carefully by following the installation manual. Locate the terminal board and connect the refrigerant lines‚ ensuring they are tightly secured to prevent leaks. Attach the drainage pipe to the unit and route it to the designated drain location. Electrical connections should be made according to the wiring diagram‚ ensuring all wires are properly insulated and securely fastened. Double-check that the power supply matches the unit’s specifications. Once all connections are made‚ test the system to ensure proper functionality and airflow. Avoid over-tightening any connections to prevent damage. Always refer to the manual for specific torque values and connection guidelines. Proper connections are crucial for efficient performance and safety. Ensure all joints are sealed and tested before finalizing the installation.

Outdoor Unit Installation
Follow the installation manual to ensure proper setup of the outdoor unit. Select a well-ventilated location and secure the unit firmly. Adhere to safety guidelines to avoid hazards.
Selecting the Outdoor Unit Location
Selecting the right location for the outdoor unit is crucial for optimal performance and safety. Ensure the area is well-ventilated and avoid direct sunlight exposure. The unit should be installed on a firm‚ level surface‚ away from flammable materials. Maintain a minimum distance of 15 feet from flammable substances and ensure proper drainage. Avoid installing near heating vents or in areas prone to flooding. Keep the unit at least 3 feet away from obstacles to ensure airflow. Incorrect placement can lead to reduced efficiency or safety hazards. Always refer to the installation manual for specific guidelines and location restrictions. Proper placement ensures reliable operation and longevity of the system.
Mounting the Outdoor Unit
Mounting the outdoor unit requires precision to ensure stability and efficiency. Use a level to ensure the unit is perfectly horizontal. Secure the unit to a sturdy base or pad to prevent vibration and movement. Avoid placing the unit on uneven or soft ground‚ as this can lead to instability. Ensure all bolts and fasteners are tightened according to the manual’s torque specifications. Check for proper drainage to prevent water accumulation. Keep the unit away from flammable materials and ensure adequate clearance around it for airflow. After mounting‚ verify that the unit is level and securely fastened to avoid operational issues. Proper mounting ensures safe and efficient operation.
Connecting the Outdoor Unit
Connecting the outdoor unit involves linking the refrigerant lines‚ electrical wiring‚ and drainage systems. Follow the wiring diagram provided in the manual to ensure correct connections. Use the appropriate tools to tighten flare nuts securely‚ avoiding over-tightening. Connect the refrigerant lines to the corresponding ports‚ ensuring they are not kinked or damaged. Electrical connections must comply with local codes and Daikin’s specifications. Verify that the circuit is properly grounded and rated for the unit’s power requirements. After connecting‚ inspect all joints for leaks using a leak detector. Ensure the drainage pipe is securely attached to prevent water accumulation. Double-check all connections before powering on the system to ensure safe and efficient operation.

Refrigerant and Electrical Connections
Proper connections are critical for safe and efficient operation. Follow the manual to connect refrigerant lines and electrical wiring‚ ensuring compliance with safety standards and specifications.
Charging the Refrigerant
Charging the refrigerant is a delicate process requiring precision. Ensure the system is evacuated and leak-free before adding refrigerant. Use a vacuum pump to remove air and moisture‚ as specified in the Daikin manual. Connect the refrigerant cylinder properly‚ and charge according to the manufacturer’s guidelines. Overcharging or undercharging can lead to poor performance or system damage. Always follow safety protocols to avoid refrigerant exposure‚ which can cause health risks. Double-check the system’s pressure using a manifold gauge to confirm proper charging. Refer to the manual for specific refrigerant requirements and safety precautions to ensure a safe and effective installation.
Electrical Wiring and Connections
Electrical wiring and connections must be completed according to the Daikin manual to ensure safety and proper system operation. Verify the power supply matches the unit’s voltage and current requirements. Use appropriately sized wires and connectors to prevent overheating or electrical issues. Connect the indoor and outdoor units following the wiring diagram provided in the manual. Ensure all connections are secure and insulated to avoid short circuits. Turn off the power supply before making any connections. Use a voltage tester to confirm power is off for safety. Adhere to local electrical codes and Daikin’s guidelines to ensure a safe and reliable installation. Proper wiring is critical for optimal performance and longevity of the system.
Testing the Electrical System
Testing the electrical system ensures all components function safely and efficiently. Use a multimeter to verify voltage and current levels match the specifications in the Daikin manual. Check for short circuits or open connections by measuring resistance across wires. Ensure proper grounding to prevent electrical shocks. Test the circuit breaker or fuse to confirm it trips when overloaded. Verify that all safety features‚ such as overcurrent protection‚ are functioning correctly. Refer to the wiring diagram for specific test points and procedures. Proper testing ensures the system operates safely and efficiently‚ minimizing the risk of electrical hazards. Always follow safety guidelines when working with live electricity.

Drainage and Plumbing
Proper drainage installation prevents water damage and ensures efficient system operation. Use the provided drainage kit to connect the drain pipe securely‚ ensuring proper water discharge.
Drainage Kit Installation
Proper drainage kit installation is crucial to prevent water damage and ensure efficient system operation. Locate the drainage outlet on the indoor unit and connect the drain pipe securely. Use the provided fittings and connectors to ensure a tight seal. Route the drain pipe to a suitable location‚ avoiding kinks or blockages. Secure the pipe properly to prevent movement or leakage. Follow the manual’s instructions for specific installation requirements. Use only materials recommended by Daikin to avoid compatibility issues. Ensure the drain pipe is sloped correctly for proper water flow. Refer to the manual for detailed diagrams and steps to complete the installation accurately.
Connecting the Drain Pipe
Connecting the drain pipe is essential for proper water disposal from the Daikin mini split system. Locate the drain port on the indoor unit and attach the drain pipe securely. Use the provided fittings to ensure a watertight connection. Route the pipe to a suitable drainage point‚ avoiding kinks or bends that could obstruct flow. Ensure the pipe is properly sloped to prevent water from pooling. Secure the drain pipe with clips or brackets to prevent movement. Refer to the manual for specific connection instructions and recommended materials. Double-check the connections for leaks before system startup; Proper drainage ensures efficient operation and prevents water damage. Follow Daikin’s guidelines for optimal performance.
Testing the Drainage System
Testing the drainage system ensures proper function and prevents water-related issues. After connecting the drain pipe‚ run the system in cooling mode to generate condensate. Observe the water flow through the pipe to ensure it drains smoothly. Check for leaks at connections and joints using a water test kit if available. Verify that water exits the unit and flows freely into the drainage point. If water pools or leaks‚ inspect the pipe for kinks or blockages. Ensure the drain pipe is correctly sloped and securely attached. Consult the manual for specific testing procedures. Proper drainage is crucial for efficiency and system longevity. Address any issues immediately to avoid damage or mold growth.

Final Checks and Testing
Ensure all systems operate correctly after installation. Verify refrigerant levels‚ electrical connections‚ and drainage. Test cooling‚ heating‚ and airflow. Check for leaks and proper function. Run diagnostics to confirm everything works seamlessly and efficiently. Follow the manual for precise testing procedures to ensure optimal performance and safety. Address any issues promptly to prevent future malfunctions.
Pre-Startup Checks
Before starting the Daikin mini split system‚ perform a thorough pre-startup inspection. Verify that all electrical connections are secure and meet local codes. Ensure the refrigerant lines are properly insulated and free from damage. Check the drain pipe installation and confirm it’s functioning correctly to prevent water accumulation. Inspect the air filters for cleanliness and proper installation. Review the wiring diagram to ensure all components are correctly connected. Test the remote control functionality and thermostat settings. Make sure all safety features‚ such as emergency shutoff‚ are operational. Consult the installation manual for specific checks to ensure system safety and efficiency.
Starting the System
After completing all pre-startup checks‚ power on the Daikin mini split system. Set the remote control to the desired mode‚ such as cooling or heating. Adjust the temperature and fan settings as needed. Allow the system to run for a few minutes to ensure proper operation. Listen for unusual noises and monitor the airflow for consistency; Check the outdoor unit to confirm the compressor and fan are functioning. Verify that the system reaches the set temperature and maintains it steadily. If any issues arise‚ refer to the troubleshooting section in the manual or contact a certified technician for assistance. Proper startup ensures optimal performance and efficiency.
Testing System Performance
Once the system is operational‚ test its performance by evaluating cooling and heating capabilities. Check if the system maintains the set temperature consistently. Ensure proper airflow through vents and verify that there are no unusual noises. Inspect for any refrigerant leaks or water drainage issues. Test the system’s responsiveness to remote control commands‚ ensuring smooth transitions between modes. Monitor energy consumption to confirm it aligns with expectations. If the system does not perform as expected‚ consult the manual or contact a certified technician to address potential issues. Proper testing ensures the system operates efficiently and effectively‚ meeting your comfort needs. Regular checks are essential for long-term performance.

Maintenance and Troubleshooting
Regular maintenance ensures optimal performance. Clean air filters‚ check for refrigerant leaks‚ and inspect drainage systems. Troubleshooting common issues like error codes or uneven cooling requires consulting the manual or contacting a technician.
Regular Maintenance Tips
Regular maintenance ensures your Daikin mini split system operates efficiently. Clean the air filters monthly to improve airflow and energy efficiency. Check for refrigerant leaks‚ as they can reduce performance. Inspect the drainage system to prevent water accumulation‚ which may lead to mold or damage. Schedule professional servicing annually to inspect internal components like coils and compressors. Additionally‚ power cycle the unit monthly to clear any system errors. Always refer to the installation manual for detailed maintenance procedures. Keep the area around the unit clean to ensure proper airflow. Regular upkeep prevents common issues and extends the system’s lifespan‚ ensuring optimal performance.
Common Issues and Solutions
Common issues with Daikin mini split systems include water leakage‚ electrical malfunctions‚ and refrigerant leaks. Water leakage often results from clogged drain pipes or improper installation. Regularly inspect and clean the drainage system to prevent this. Electrical issues may arise from faulty wiring or circuit overloads. Ensure all connections are secure and consult a professional if problems persist. Refrigerant leaks can cause reduced cooling performance and require immediate attention. Check for signs like hissing sounds or ice buildup and contact a certified technician for repairs. Addressing these issues promptly ensures optimal performance and extends the system’s lifespan.
Warranty and Service Information
Daikin mini split systems typically come with a standard warranty covering parts and labor for a specified period. Proper installation‚ as outlined in the manual‚ is essential to maintain warranty validity. Improper installation can void the warranty‚ so adherence to guidelines is crucial. Regular maintenance‚ such as cleaning filters and inspecting drain pipes‚ is recommended to ensure optimal performance. For service‚ contact Daikin’s authorized dealers or refer to the warranty section in the installation manual. The manual also provides details on registering your product and understanding warranty terms. Always use genuine Daikin parts for repairs to avoid compromising the system’s performance and warranty coverage.
Successful installation of a Daikin mini split ensures efficient heating and cooling. Proper setup and adherence to the manual guarantee optimal performance and system longevity. Contact Daikin for support.
Ensure safety by following precautions and using specified tools. Prepare the site and understand the manual thoroughly. Mount indoor and outdoor units correctly‚ connecting refrigerant and electrical systems. Install drainage kits and test the system. Conduct pre-startup checks and test performance. Regular maintenance is essential for optimal functionality. Address common issues promptly and refer to the warranty for service needs. Adherence to the manual ensures efficiency and longevity of the Daikin mini split system‚ providing reliable heating and cooling.
Final Tips for Optimal Performance
To ensure your Daikin mini split operates efficiently‚ maintain regular filter cleaning and check refrigerant levels. Inspect drainage systems to prevent blockages and ensure proper airflow. Keep the outdoor unit clear of debris and avoid extreme temperature exposure. Schedule professional servicing annually to address hidden issues. Always refer to the manual for troubleshooting and adhere to Daikin’s guidelines. By following these tips‚ you can extend the system’s lifespan‚ reduce energy consumption‚ and enjoy consistent heating and cooling performance.